Getting Started
Welcome to the Cloud Game Development Toolkit. There are a number of ways to use this repository depending on your development needs. This guide will introduce some of the key features of the project, and provide detailed instructions for deploying your game studio on AWS.
Introduction to Repository Structure
Assets
An asset is a singular template, script, or automation document that may prove useful in isolation. Currently, the Toolkit contains three types of assets: Ansible playbooks, Jenkins pipelines, and Packer templates. Each of these assets can be used in isolation. For more information about assets specifically consult the detailed documentation.
Modules
A module is a reusable Terraform configuration encapsulating all of the resources needed to deploy a particular workload on AWS. These modules are highly configurable through variables, and provide necessary outputs for building interconnected architectures. We recommend reviewing the Terraform module documentation if you are unfamiliar with this concept. Modules are designed for you to depend on in your own Terraform modules, and we don't expect you to have to make any modifications to them; that said, if a module doesn't meet your needs, please raise an issue!
Samples
A sample is a complete reference architecture that stitches together modules and first-party AWS services. A sample is deployed with Terraform, and is the best way to get started with the Cloud Game Development Toolkit. Samples are designed for you to copy from and modify as needed to suit your architecture and needs.
Note
Because samples may deploy resources that have unique name constraints, we cannot guarantee that two different samples can be deployed into the same AWS account without modifying either of the samples to integrate shared infrastructure or resolve conflicts. If you're interested in using functionality from multiple samples, we recommend that you use them as reference material to base your own infrastructure off of.
Step by Step Tutorial
This section will walk you through the prerequisites for deploying the Simple Build Pipeline, the actual deployment process with Terraform, and basic configuration of Jenkins and Perforce.
Step 1. Install Prerequisites
You will need the following tools to complete this tutorial:
Step 2. Create Perforce Helix Core Amazon Machine Image
Prior to deploying the infrastructure for running Perforce Helix Core we need to create an Amazon Machine Image containing the necessary software and tools. The Cloud Game Development Toolkit contains a Packer template for doing just this.
- From your terminal, run the following commands from the root of the repository (this example assumes usage of arm64 architecture):
packer init ./assets/packer/perforce/helix-core/perforce_arm64.pkr.hcl
packer build ./assets/packer/perforce/helix-core/perforce_arm64.pkr.hcl
This will use your AWS credentials to provision an EC2 instance in your Default VPC. The Region, VPC, and Subnet where this instance is provisioned and the AMI is created are configurable - please consult the example.pkrvars.hcl file and the Packer documentation on assigning variables for more details.
Note
The Perforce Helix Core template will default to the us-west-2 (Oregon) region, if a region is not provided.
Note
The AWS Region where this AMI is created must be the same Region where you intend to deploy the Simple Build Pipeline.
Step 3. Create Build Agent Amazon Machine Images
This section covers the creation of Amazon Machine Images used to provision Jenkins build agents. Different studios have different needs at this stage, so we'll cover the creation of three different build agent AMIs.
Note
The Build Agent templates will default to the us-west-2 (Oregon) region, if a region is not provided.
Amazon Linux 2023 ARM based Amazon Machine Image
This Amazon Machine Image is provisioned using the Amazon Linux 2023 base operating system. It is highly configurable through variables, but there is only one variable that is required: A public SSH key. This public SSH key is used by the Jenkins orchestration service to establish an initial connection to the agent.
This variable can be passed to Packer using the -var-file or -var command line flag. If you are using a variable file, please consult the example.pkrvars.hcl for overridable fields. You can also pass the SSH key directly at the command line:
packer build -var "public_key=<include public key here>" amazon-linux-2023-arm64.pkr.hcl
Note
The above command assumes you are running packer from the /assets/packer/build-agents/linux directory.
Then securely store the private key value as a secret in AWS Secrets Manager.
aws secretsmanager create-secret \
    --name JenkinsPrivateSSHKey \
    --description "Private SSH key for Jenkins build agent access." \
    --secret-string "<insert private SSH key here>" \
    --tags 'Key=jenkins:credentials:type,Value=sshUserPrivateKey' 'Key=jenkins:credentials:username,Value=ec2-user'
Take note of the output of this CLI command. You will need the ARN later.
Ubuntu Jammy 22.04 X86 based Amazon Machine Image
This Amazon Machine Image is provisioned using the Ubuntu Jammy 22.04 base operating system. Just like the Amazon Linux 2023 AMI above, the only required variable is a public SSH key. All Linux Packer templates use the same variables file, so if you would like to share a public key across all build nodes we recommend using a variables file. To build this AMI with a variables file called linux.pkrvars.hcl you would use the following command:
# This command fails if not run from the '/assets/packer/build-agents/linux' directory.
packer build -var "public_key=<include public key here>" ubuntu-jammy-22.04-amd64-server.pkr.hcl
Warning
The above command assumes you are running packer from the /assets/packer/build-agents/linux directory.
Finally, you'll want to upload the private SSH key to AWS Secrets Manager so that the Jenkins orchestration service can use it to connect to this build agent.
aws secretsmanager create-secret \
    --name JenkinsPrivateSSHKey \
    --description "Private SSH key for Jenkins build agent access." \
    --secret-string "<insert private SSH key here>" \
    --tags 'Key=jenkins:credentials:type,Value=sshUserPrivateKey' 'Key=jenkins:credentials:username,Value=ubuntu'
Take note of the output of this CLI command. You will need the ARN later.
Windows 2022 X86 based Amazon Machine Image
This Amazon Machine Image is provisioned using the Windows Server 2022 base operating system. It installs all required tooling for Unreal Engine 5 compilation by default. Please consult the release notes for Unreal Engine 5.4 for details on what tools are used for compiling this version of the engine.
Again, the only required variable for building this Amazon Machine Image is a public SSH key.
packer build -var "public_key=<include public ssh key here>" windows.pkr.hcl
Note
The above command assumes you are running packer from the /assets/packer/build-agents/windows directory.
Finally, you'll want to upload the private SSH key to AWS Secrets Manager so that the Jenkins orchestration service can use it to connect to this build agent.
aws secretsmanager create-secret \
    --name JenkinsPrivateSSHKey \
    --description "Private SSH key for Jenkins build agent access." \
    --secret-string "<insert private SSH key here>" \
    --tags 'Key=jenkins:credentials:type,Value=sshUserPrivateKey' 'Key=jenkins:credentials:username,Value=jenkins'
Take note of the output of this CLI command. You will need the ARN later.
Step 4. Create Route53 Hosted Zone
Now that all of the required Amazon Machine Images exist we are almost ready to move on to provisioning infrastructure. However, the Simple Build Pipeline requires that we create one resource ahead of time: A Route53 Hosted Zone. The Simple Build Pipeline creates DNS records and SSL certificates for all the applications it deploys to support secure communication over the internet. However, these certificates and DNS records rely on the existence of a public hosted zone associated with your company's route domain. Since different studios may use different DNS registrars or DNS providers, the Simple Build Pipeline requires this first step to be completed manually. Everything else will be deployed automatically in the next step.
If you do not already have a domain you can register one with Route53. When you register a domain with Route53 a public hosted zone is automatically created.
If you already have a domain that you would like to use for the Simple Build Pipeline please consult the documentation for making Amazon Route 53 the DNS service for an existing domain.
Once your hosted zone exists you can proceed to the next step.
Step 5. Configure Simple Build Pipeline Variables
Configurations for the Simple Build Pipeline are split between 2 files: local.tf and variables.tf. Variables in local.tf are typically static and can be modified within the file itself. Variables in variables.tf tend to be more dynamic and are passed in through the terraform apply command either directly through a -var flag or as file using the -var-file flag.
We'll start by walking through the required configurations in local.tf.
allowlistgrants public internet access to the various applications deployed in the Simple Build Pipeline. At a minimum you will need to include your own IP address to gain access to Jenkins and Perforce Helix Core for configuration following deployment. For example, if your IP address is192.158.1.38you would want to setallowlist=["192.158.1.38/32"]to grant yourself access.
Note
The /32 suffix above is a subnet mask that specifies a single IP address. If you have different CIDR blocks that you would like to grant access to you can include those as well.
-
jenkins_agent_secret_arnsis a list of AWS Secrets Manager ARNs that the Jenkins orchestration service will be granted access to. This is primarily used for providing private SSH keys to Jenkins so that the orchestration service can connect to your build agents. When you created build agent AMIs earlier you also uploaded private SSH keys to AWS Secrets Manager. The ARNs of those secrets should be added to thejenkins_agent_secret_arnslist so that Jenkins can connect to the provisioned build agents. -
The
build_farm_computemap contains all of the information needed to provision your Jenkins build farms. Each entry in this map corresponds to an EC2 Auto Scaling group, and requires two fields to be specified:amiandinstance_type. Thelocal.tffile contains an example configuration that has been commented out. Using the AMI IDs from Step 3, please specify the build farms you would like to provision. Selecting the right instance type for your build farm is highly dependent on your build process. Larger instances are more expensive, but provide improved performance. For example, large Unreal Engine compilation jobs will perform significantly better on Compute Optimized instances, while cook jobs tend to benefit from the increased RAM available from Memory Optimized instances. It can be a good practice to provision an EC2 instance using your custom AMI, and run your build process locally to determine the right instance size for your build farm. Once you have settled on an instance type, complete thebuild_farm_computemap to configure your build farms. -
Finally, the
build_farm_fsx_openzfs_storagefield configures file systems used by your build agents for mounting Helix Core workspaces and shared caches. Again, an example configuration is provided but commented out. Depending on the number of builds you expect to be performing and the size of your project, you may want to adjust the size of the suggested file systems.
The variables in variables.tf are as follows:
root_domain_namemust be set to the domain name you created a public hosted zone for in Step 4. Your applications will be deployed at subdomains. For example, ifroot_domain_name=example.comthen Jenkins will be available atjenkins.example.comand Perforce Helix Core will be available atcore.helix.example.com.
Step 6. Deploy Simple Build Pipeline
Now we are ready to deploy your Simple Build Pipeline! Navigate to the /samples/simple-build-pipeline directory and run the following commands:
terraform init
This will install the modules and required Terraform providers.
terraform apply -var "root_domain_name=<insert your root domain>"
This will create a Terraform plan, and wait for manual approval to deploy the proposed resources. Once approval is given the entire deployment process takes roughly 10 minutes.
Step 7. Configure Jenkins
Now that everything is deployed, its time to configure the applications included in the Simple Build Pipeline. First, we will setup Jenkins.
Initial Access
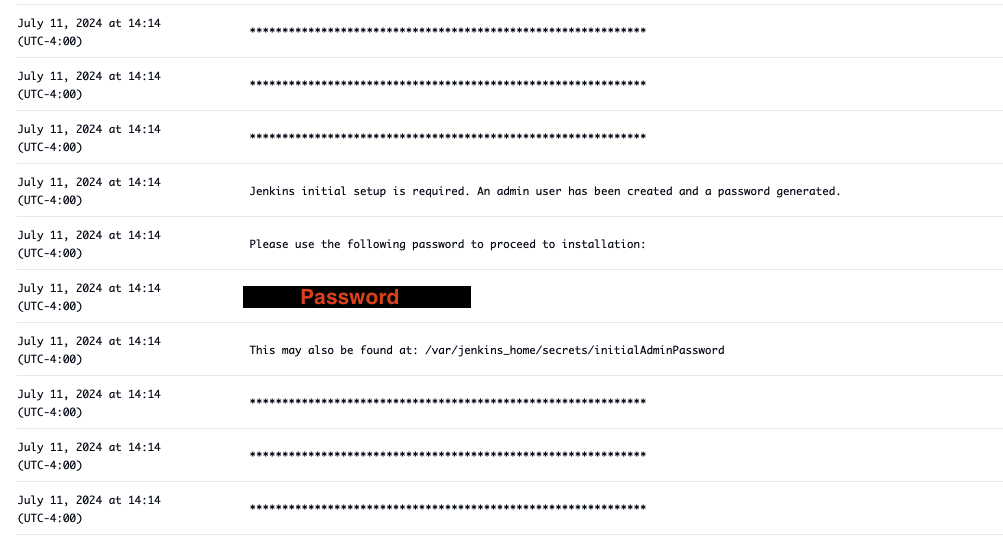
When accessing Jenkins for the first time, an administrator's password is required. This password is auto-generated and available through the service logs.
- Open the AWS console and navigate to the Elastic Container Service (ECS) console.
- In the
Clusterstab, select thebuild-pipeline-cluster - Select the
cgd-jenkins-service - Select the
Logstab - Scroll through the logs until you find the password, below is an example of what the password section looks like. Note that each line is shown as its own log entry in the console.
Open the Jenkins console in your preferred browser by navigating to jenkins.<your fully qualified domain name>, and log in using the administrator's password you just located. Install the suggested plugins and create your first admin user. For the Jenkins URL accept the default value.
Useful Plugins
There are 2 plugins recommended for the solutions: The EC2 Fleet Plugin and the AWS Secrets Manager Credentials Provider Plugin. The EC2 Fleet Plugin is used to integrate Jenkins with AWS and allows EC2 instances to be used as build nodes through an autoscaling group. The AWS Secrets Manager Credentials Provider Plugin will allow users to store their credentials in AWS Secrets Manager and seamlessly access them in Jenkins.
- Open the Jenkins console.
- On the left-hand side, select the
Manage Jenkinstab. - Then, under the
System Configurationsection, selectPlugins. - On the left-hand side, select
Available plugins. - Using the search bar at the top of the page, search for
EC2 Fleet. - Select the
EC2 Fleetplugin. - Using the search bar at the top of the page, search for
AWS Secrets Manager Credentials Provider. - Select the
AWS Secrets Manager Credentials Providerplugin. - Click
installon the top-right corner of the page. - Once the installation is complete, Select
Go back to the top pageat the bottom of the page
Jenkins Cloud Configuration
We now need to setup our Auto Scaling groups as Jenkins build agents. To do this, we will create multiple Jenkins "Cloud" resources; one for each of the Auto Scaling groups we deployed in the previous step.
- From the Jenkins homepage, on the left-hand side, choose
Manage Jenkins. - Under the
System Configurationsection, chooseClouds - Select
New Cloud - Enter a name for your cloud configuration
- Select
Amazon EC2 Fleet - Click
Create - On the
New Cloudconfiguration page, change the following settings.- Region - Select the region in which you deployed the Simple Build Pipeline
- EC2 Fleet - Select the autoscaling group you would like to use
- Launcher - Select
Launch agents via SSH - Launcher -> Credentials - Select the credentials associated with that particular autoscaling group
- Launcher -> Host Key Verification Strategy - Select
Non verifying Verification Strategy - Connect to instaces via private IP instead of public IP - Select the
Private IPcheck box - Max Idle Minutes Before Scaledown - Set this variable to
5(minutes). Feel free to change this based on your needs.
Repeat the process above for each of the Auto Scaling groups you specified in your build_farm_compute configuration. You should now be able to reference these "Cloud" agents in your Jenkins pipeline definitions.
Step 8. Configure Helix Authentication Service
The Helix Authentication Service provides integrations with common identity providers so that end-users of Helix Core and Helix Swarm can use their existing credentials to access version control and code review tools.
The Simple Build Pipeline deploys the Helix Authentication Service with the administrator web-based UI enabled. You should be able to navigate to auth.helix.<your fully qualified domain name>/admin to configure your external IDP.
The deployment of the Helix Authentication Service module as part of the Simple Build Pipeline creates a random administrator password and stores it in AWS Secrets Manager. You can find this password by navigating to the AWS Secrets Manager console and viewing the helixAuthServiceAdminUserPassword secret. The username is also available under helixAuthServiceAdminUsername. Use these credentials to access the web UI and configure your identity provider.
Step 9. Test Helix Core and Helix Swarm
Like Helix Authentication Service, a random administrator's password is created for Helix Core and Helix Swarm. The username and password are available in AWS Secrets Manager under the secrets named perforceHelixCoreSuperUserPassword and perforceHelixCoreSuperUserUsername. Use these credentials to access Helix Core and Helix Swarm for the first time.
Once you have access to Helix Core you should be able to provision new users. You can do this through the P4Admin GUI or from the command line. For more information please conuslt the Perforce Helix Core documentation. Users provisioned with an email address that corresponds with the identity provider configured in Helix Authentication Service will be able to use their existing credentials to log in to Helix Core and Helix Swarm.
Step 10. Cleanup
Tearing down the resources created by the Simple Build Pipeline is as easy as running terraform destroy in the /samples/simple-build-pipeline directory. However, this will not delete the secrets you've uploaded, the AMIs created with Packer, or the the Route53 hosted zone you set up initially. Those resources will need to be explicitly destroyed using the AWS console or relevant CLI commands.