Perforce Complete Example
This complete example configuration deploys Perforce Helix Core, Perforce Helix Swarm, and Perforce Helix Authentication Service into a new Virtual Private Cloud. It is designed to be used as a starting point for your Perforce Helix Core deployment.
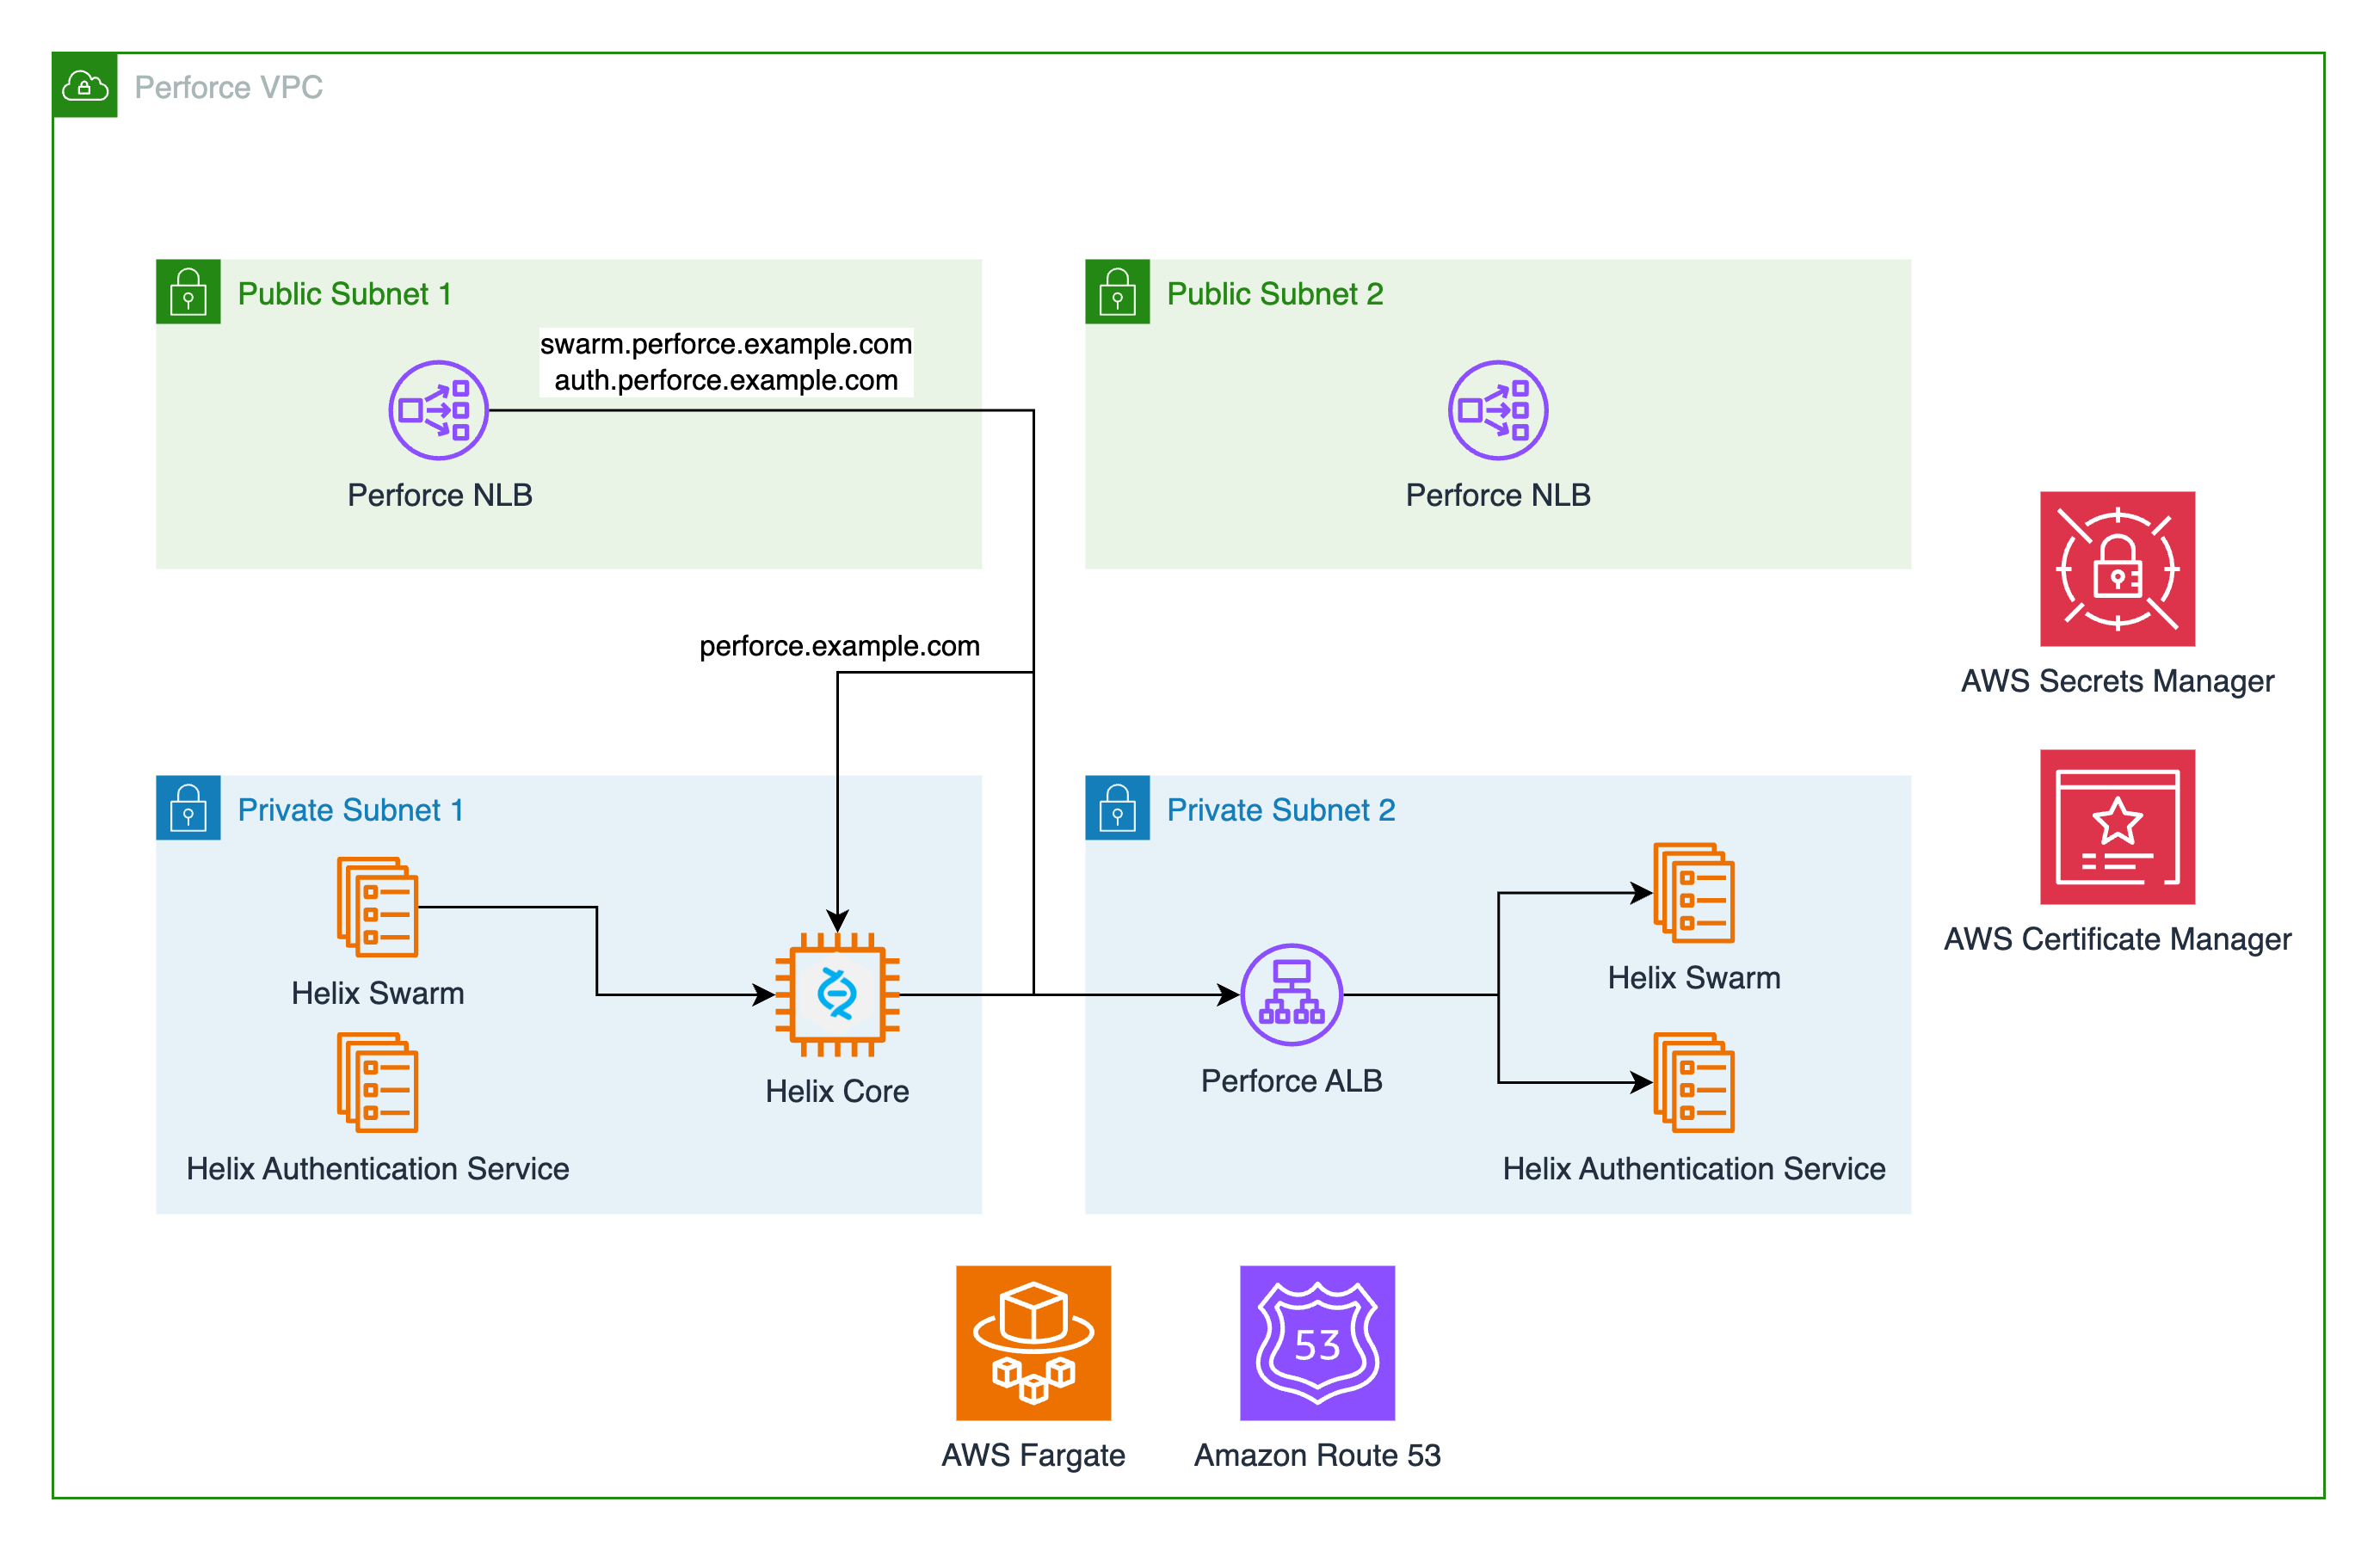
Architecture
Deployment
This example configuration can be used out of the box and takes only a single variable: root_domain_name corresponds
to the fully qualified domain name of an existing public hosted zone in the AWS account where you are deploying this
reference architecture. The deployment steps below will get you up and running.
- You will need the Cloud Game Development Toolkit's Perforce Helix Core Amazon Machine Image. This Amazon Machine Image (AMI) can be built using our provided Packer template. This example uses the ARM64 version of this AMI, and leverages Amazon Graviton for the Helix Core instance. Follow our documentation for provisioning this AMI in your AWS account.
- Next, you will need to ensure you have an Amazon Route 53 hosted zone created in your account for a domain name that you already own. This example configuration creates DNS records and a private hosted zone for you, but this pre-requisite hosted zone is necessary for certificate creation. If you do not wish to use the provided DNS resources you will need to customize this example.
-
Once you have completed these pre-requisites you are ready to deploy the infrastructure:
terraform apply -var "root_domain_name=<YOUR ROOT HOSTED ZONE NAME>" -
Review the plan provided by the above command. When you are ready to deploy you can confirm by typing "yes" on the command line. Terraform will take a few minutes to provision everything. When it completes, you are ready to proceed with testing.
-
By default, none of the deployed resources are available on the public internet. This is to prevent unintended security violations. You can update the security group for the Perforce Network Load balancer through the console, or add the following rules to the example configuration in
security.tf:```terraform # Grants access on HTTPS port for Helix Swarm and Helix Authentication resource "aws_vpc_security_group_ingress_rule" "private_perforce_https_ingress" { security_group_id = aws_security_group.perforce_network_load_balancer.id description = "Enables private access to Perforce web services." from_port = 443 to_port = 443 ip_protocol = "TCP" cidr_ipv4 = "
/32" }
# Grants access on Helix Core port
resource "aws_vpc_security_group_ingress_rule" "private_perforce_https_ingress" {
security_group_id = aws_security_group.perforce_network_load_balancer.id
description = "Enables private access to Perforce Helix Core."
from_port = 1666
to_port = 1666
ip_protocol = "TCP"
cidr_ipv4 = "
} ``` 6. You should now have access to your deployed resources. The URLs for Helix Swarm and Helix Authentication Service are provided as Terraform outputs and should be visible in your console after a successful deployment. The connection string for Helix Core is also provided as an output. Use the Helix Core CLI or the P4V application to connect to your Helix Core server.